How to Use Git for Website Development? (Tips for PHP Developers)
Coding (Php 7.x)
Efficient website development with Git for PHP developers. Level up your skills with these practical tips and best practices

In this article, you are going to discover a feature that changed my life and one of thousands of developers for the better.
We’ll be talking about GIT,
GIT is a version-control system for tracking changes in source code during the development phase
Before delving into what that means let me tell you a story
The year is 2015,
Just a few weeks in at a new job as a PHP developer for a web development start-up and my boss asked me to create a CMS for a long-time hotel owner who just became a client of us.
If you have managed a hotel for a few decades you are supposed to know what you need when you reach out for an automatic CMS that has to manage employees and room bookings.
As you might have guessed already, that was not the case.
The project started with the best intentions, the owner was excited about the features we were going to implement and happy about all the time that the system was going to save him.
After a few weeks, we presented the project and we understood from his eyes that things have changed.
Initially, he told us he needed a to-do list that the employees can tick once their duties were completed, but not anymore.
Was letting the users book their rooms using a built-in calendar a good idea? Nope!
There was some good stuff but for the majority, we had to rewrite the main stuff from scratch.
The way I did it?
HotelProjectFolder_v2
Eventually, the project was delivered successfully but I almost needed to buy an external hard drive to finish it.
Let me tell you,
creating new folders for each version of your project is not a good idea.
The series
Git for PHP developer is a series realized for a web developer that wants to start using tools to increase their productivity.
- Git for PHP developer (Installation & Configurations)
- Git for PHP developer (Manage branches)
- Git for PHP developer (Merging)
- Git for PHP developer (Sync)
What is GIT?
As we said before GIT is a version control system that tracks changes in some code,
What’s that?
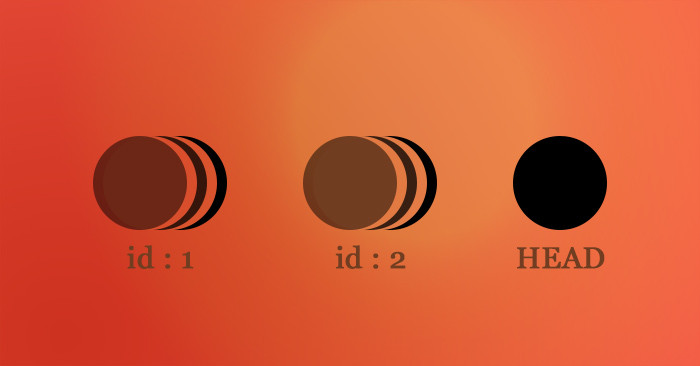
Think of GIT as a register it takes notes of all the changes you and your collaborators make in your code and give it a specific id.
In this way, if someone made a mistake or you want to come back to a previous version all you need to do is to specify what id you need and voila there your code is.
No more duplicated folders anymore.
There are many advantages to using this system.
As we said if you want to roll back to a previous version all you need to do is to type the right command and specify the point in time you want to come back, like a time machine for web developers.
Since you have all the code in only one place is very easy to verify the history of your files when it was edited, what changes were made, and who was the one that inserted a bug in your beloved class.
You will see in more detail below but this timeline of code registration does not need to be straight, you can decide to add a new feature that is not developed in the main code and if you like the final result of this feature merge it back into the main code (I know its a lot confusing right now, but stick with me).
You can now write your code, let someone else download it add his code (hopefully bugless), and join the two versions together.
It means you can have hundreds of developers working on a project.
I hope I sold you this magical system already.
If so, let's have a look at how GIT works.
if you prefer to step back a little you can check the basics of PHP out.
How GIT works
Let’s start with a bit of jargon, you still have your code and it will be still stored inside a directory, once you initialize a normal directory containing code into a git directory this now is called a repository (or repo for brevity).
A repo is nothing more than a directory in which the GIT system will keep track of the changes.
So far so good.
Second world of the day: Commit.
Commit is a snapshot of all the files contained in a repo at a given time.
You will have your initial commit when you make a directory a repo and when you change some code.
You can have as many commits as you want and each of this commit has an identifier so you can refer to it when needed.
The list of all these commits one after another is called commit history.
There are 3 steps that you need to put a file in a commit,
First, of course, you need to modify it.
You can have as many changes as you want between a commit and another.
Then you need to stage the file, this means that you are adding the file to a “limbo” a place in which you indicate that a file has been modified, you want to commit this file but it has not been committed yet.
Eventually, you want to create a commit and insert all the staged updates into it.
The last keyword is "branch".
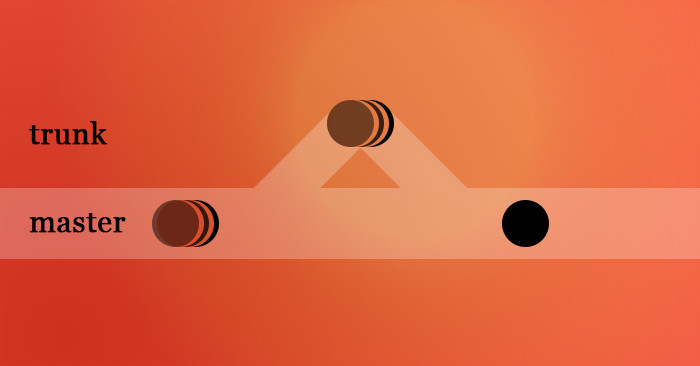
Imagine this timeline of commit history like a trunk of a tree, in here there are all the files of your project, there are several ways you can edit this truck.
Updating the trank itself, this technique is called Trunk based development or creating an external branch that splits from a given commit and is then added to the trunk once all the updates are ready and tested (hopefully).
To make it easier from now on we are going to call this trunk with his git name “master”.

So,
You learned what is a repo,
that the different versions of your code are called commits and they usually live on a timeline called master.
You can edit, stage, and add your file to your commit and you can do that using different techniques.
All this new stuff, and you still haven’t installed GIT on your machine yet.
How to do so?
Read below.
Installation and Configuration
GIT is a software, and like all the other software in the world if you need to use you need to download and install it.
Git takes care of all types of developers it provides the software in all the SO available.
To download and install it all you have to do is visit their download GIT page, click the button you need, and follow the steps as indicated by the software.
This is a command-line tool, especially for a beginner though I advise the use of one of the several GUIs available.
Among the most popular, GUI clients, are Tower for Mac and Windows, and Sourcetree.
You can verify you have downloaded and installed GIT correctly by typing the following command in your terminal.
git --version
This should echo the version you have just installed.
Now, as we said git keeps track of the changes that have been done to a file and the developer who did it.
This means you need an account that let GIT understand who is working on the repos.
To set up your account you need a username and an email
Let’s do it together
git config --global user.name john
git config --global user.email john.iam@using.git
In the example above I chose to use the global flag to set my username globally in the machine, you probably want to do the same.
If not, just skip it.
Again you can verify that you have set them up correctly via the command line just typing
git config user.name
john

git config user.email
john.iam@using.git
If everything went fine you should now see your details appear on the screen.
What these commands did was add a couple of key-value pairs in a file called .gitconfig.
To see the content of this file just type
git config --global -l
You can remove some of these values with the command
git config --global --unset user.name
And know the username has disappeared from the config file and there is no username registered anymore,
The config file is also where you can set an alias for all your GIT command
Let’s change the ‘checkout’ command into a single letter.
git config --global alias.c checkout
Since you are going to use these commands a lot it will be helpful to create several aliases for the command you are going to use the most.
It will save you a ton of time.
Another command you may want to look up that will help you add more configurations and use git properly is
git help
The .gitignore file
There is a high chance that you do not want to add all your files in your repo to the commit history.
A real-world example of this is PHP frameworks.
If you have worked with frameworks like Laravel or CodeIgniter before you probably know that those need a lot of packages to work properly, and all these packages have dependencies on their own.
These can end up in hundreds of MB of files that you do not need to download.
Several services like composer or npm require just one or two commands to be set up and can download all the packages for you.
Other types of files that you do not want in your history are the file that stores your environmental variable.
I bet you do not want to have a commit that stores a file that contains the password of your database.
To avoid these problems GIT provided a file that stores all the files and directories of your repo that you do not want to add.
Think of it as a unwatch for the file system, GIT look for any changes in your repo, if a file is indicated in the .gitignore file, it just does not look at that part of the directory.
To use this feature you simply have to add this file and follow the strength naming convention gitignore.
Repositories
You have read that, to be able to use GIT, the directory that contains the PHP and other files of your project need to “become” a repo.
There are two ways you can create a repo.
The first way to be used if you are starting a project from the beginning is to initialize the directory.
To do so you have to get inside the folder using the command line and type the command
git init
What will happen is that git, which is installed in your machine will create a folder called .git.
This folder contains other folders such as objects, refs/heads, refs/tags, and template files.
It also contains an initial HEAD file that references the HEAD of the master branch will be automatically created.
The head is a file and most of the time it holds a reference to the last commit in the current branch.
ref: refs/heads/master
Content of the HEAD file

There are cases in which the HEAD is not the last commit you have done, these cases are called detached HEAD.
Let’s say you have a commit history of three commits with id 111, 222, and 333.
The head refers to commit 333.
If you want to step down one commit, you can do that by typing the checkout command (you are going to learn more about this command in the next article)
git checkout 222
You will be prompted an alert that says that now HEAD refers to a commit that is not the last.
Note that you do not need to have a brand new directory to initialize a repo, you can use git init on a repo that contains files already.
Let’s say that one of your friends have already a repo, he has initialized it and added some files already.
He now needs your help with some of your PHP skills.
What you can do is clone that repo and “download all the files and the content at its last commit”
To do it you will be using the command, you guessed it,
git clone https://github.com/laravel/laravel.git
git clone git://git.kernel.org/pub/scm/.../linux.git linux
A very useful flag for this command is the bare flag, a bare repo is a repo that only contains the git folder itself, it is useful for sharing the changes in a repo rather than working on the repo
Here is a quote from Jon Loeliger author of “Version Control with Git”.
A bare repository might seem to be of little use, but its role is crucial: to serve as an authoritative focal point for collaborative development. Other developers clone and fetch from the bare repository and push updates to it... if you set up a repository into which developers push changes, it should be bare. In effect, this is a special case of the more general best practice that a published repository should be bare.
git clone --bare thatsarepo.git
Conclusion
This was just the beginning,
Git, like everything else in the web development world, will look very difficult to understand at the beginning, and in several years of experience with it, I have never heard anyone saying they mastered these tools.
I believe that unfortunately, its use is quite “abstract” and not it is not easy to understand fully all the potential of its command.
Anyway, it is also true that we just scratched the surface and you will see how and why to implement it in your project on the next episode so subscribe to the newsletter if you haven’t done it already.
What to do now?
A few months ago a new version of PHP has been released, you will find one of the most detailed descriptions of all the changes by following this link to the new features of PHP 7.4.
If you think your PHP skill is already top-notch you can start using dev-ops tools like docker.

